Fabric Page Journal book free tutorial
Keep all your cloth dolls in one place with this great space saving idea!
Hope you enjoyed this tutorial!
Hugs,
Sonya
Rainy day Sewing day Teesha fabric patch heart tutorial
Hi all,
Its a wonderful rainy day today, husband at work, kids at school. What to do? Hmmm sewing I think.
I am going through bit of a Teesha Moore patches thing at the moment and wanted to make something from them that wasnt a bag or a table runner.
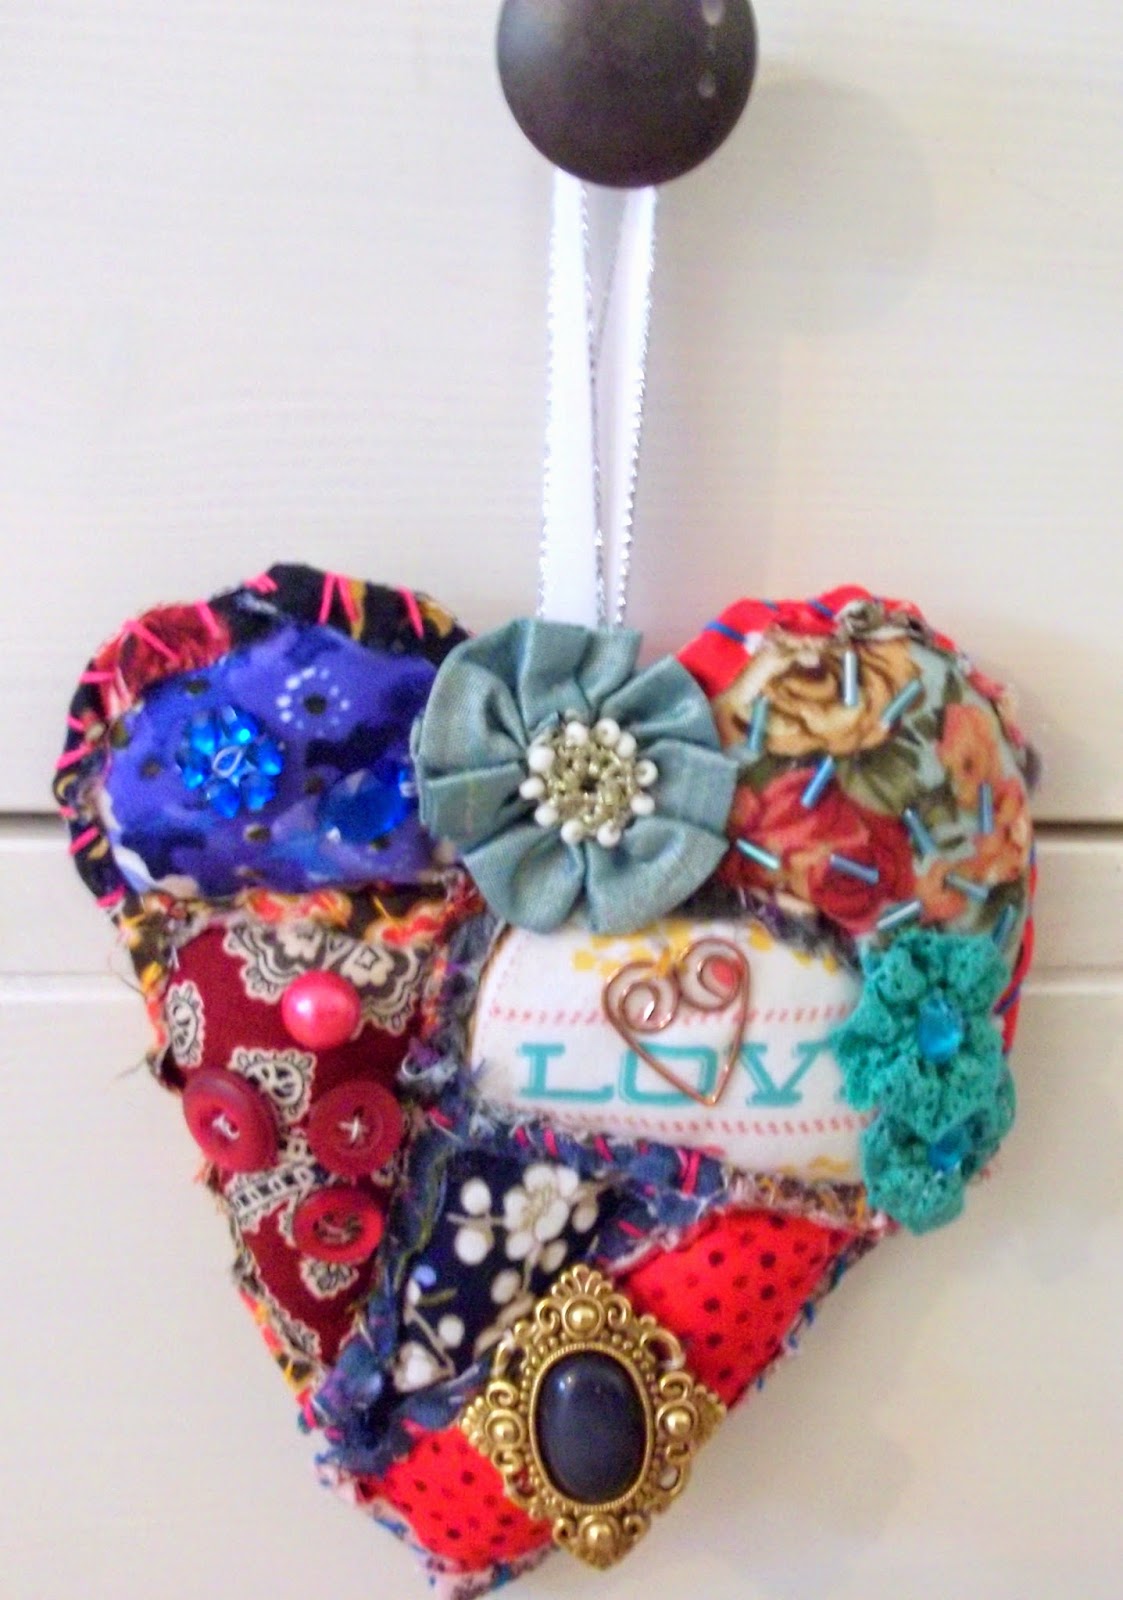
I came up with the hanging heart made from the patches I sewed.
I wanted the heart to be puffy i decided against quilting it with tiny stitches as usually is done. i just made the patches, sewed the sides and embellished with charms, beads,buttons and some fabric flowers. Sewed a loop on the top a wala... all done.
If you want to make something similar yourself this is how i did it:
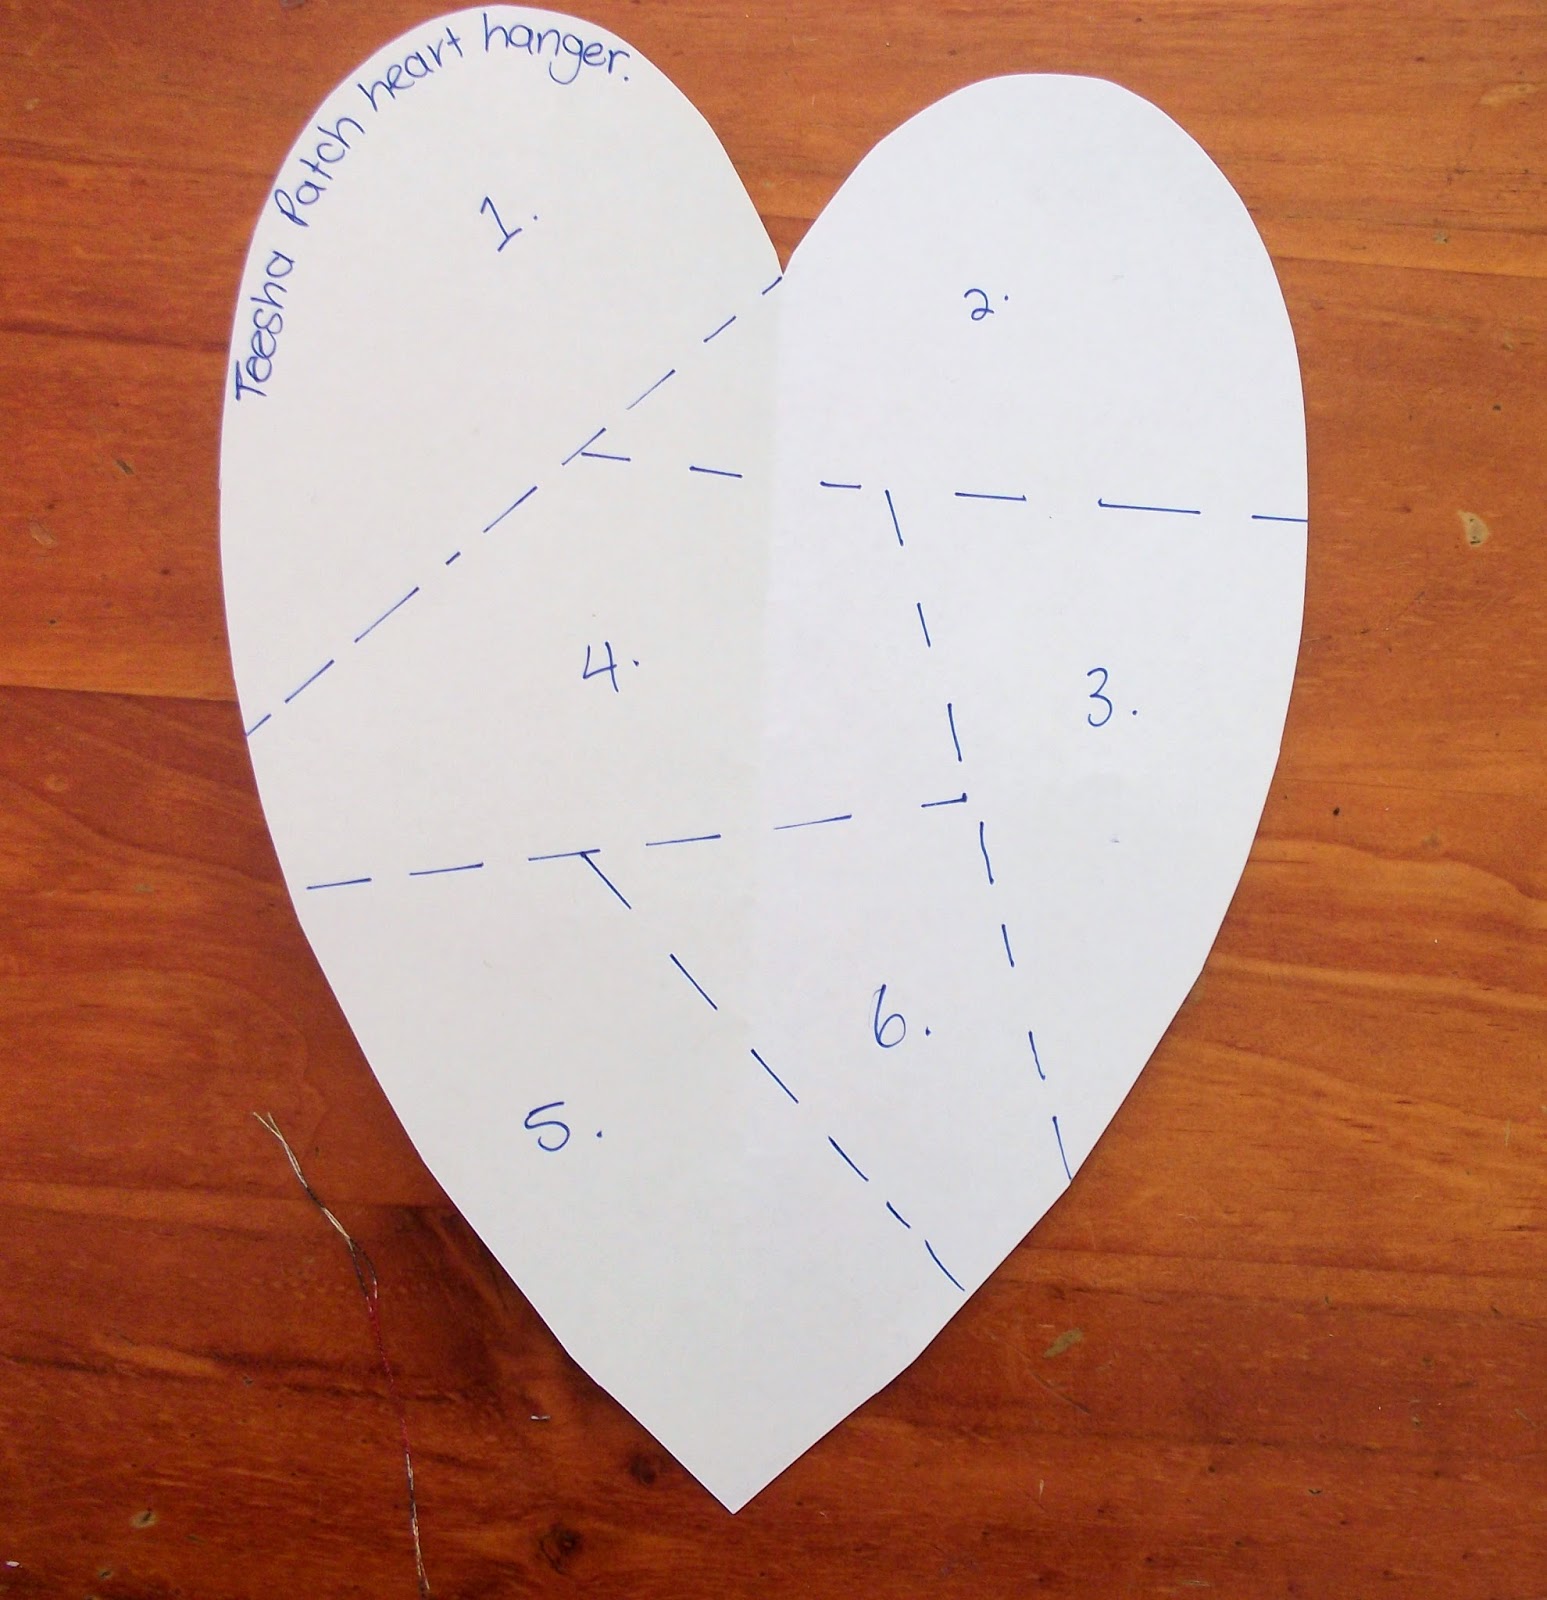
First draw a heart about twice as big as you want it to end up and then section it up like a jigsaw puzzle.
Cut along the dotted lines you made and number the pieces in a way, so that its easy to remember where they went.
Now cut your pieces out of fabric. Remember you need one piece for the back and one for the front. You dont need hem allowance. That is why we made the heart twice as big as we needed.
Now you need to sew those little pillows up with stuffing inside and put them back where they are suppose to go. This where the paper pattern underneathe helps.
Here mine all all done and ready to have the sides hand stitched over like Teesha does with the embroidery floss.
All stitched. Now pin into place and sew them together in the heart shape you arranged. I just used a simple overcast stitch.
it should all be joined together now. Sew a loop on top, if you wish to hang your heart. Now its time to embellish with your charms, beads and what ever else you can think of.
And here is the back:
Hope you enjoy and if you make one, drop me a line
Happy crafting
Hugs,
Sonya
Handmade Artist Buttons Tutorial
Step 1: find desired number of buttons, flatter topped ones with no ridges are best to use.
step 2: Trace around your button with pencil onto watercolor paper if you are using watercolor paints.
step 3: Place some watercolor paint inside your circle, use 2 different shades for interest. Let dry.
step 4: When dry draw your desired image with black sharpie pen, or any pen that is waterproof. Cut around your circle. Get your plastic button and mark lightly where the holes for the button will be( I use a needle to poke them through. Draw your image keeping that in mind.)
Step 5: Using the needle, line up your paper artwork with the button holes and glue down on top of your plastic button with any good quality craft glue, remembering to keep those holes open.
step 6: When almost dry, I then use very soft sandpaper to sand the edges of the paper, sanding downwards, a little bit of glue will comes out to the side helping the edges to stick down fast.
step 7: When dry, use a couple coats of gloss medium or 3d laquer to give them shine and protect them.
Let dry.!
If you decided to make these please link back to my site and drop me a line I would love to see them!
Cheers Sonya
You will need the following:
Quilted wadding ( what you line quilts with)
Heavy stiff interlining
Fabric scraps
Cord, braid or ribbon to tie the journal
Button
Sewing machine
Any other embellishments to decorate your cover
For ex: beads, lace, tassles
My front and back pieces measure 6 inches wide by 9.5 inches long. Measure the flap the same size then cut the two corners off.
My spine measures 1.5 inches wide.
Make your journal any size you like, this is a guideline.
1. Measure and cut pieces out of quilt wadding then cut heavy interlining slightly smaller.
2. Sew the three quilt wadding pieces together. At this stage you can sew on your stiff lining or if you prefer you can sew it on last.
3. Now sew on your colorful pieces of patchwork fabric scraps on the good side of your journal.
4. You should notice that you have a nice stiff spine now.
5. Fold over sides of front flap for a neater edge. I left the rest of my journal as is, but you can decide if you want to hem over the rest of the edges. (This is why we cut the lining slightly smaller.)
6. Now add some ribbon or cord for wrapping the journal close and finish with a button or two to wrap the cord around.
Please note this is not my idea, it is a journal I saw a picture of on the internet and this is the instructions for how I made it for myself.
 |
| Vilene heavy sew in interfacing |
 |
| quilt wadding |
So there it is.
I Hope you have fun making your own journal cover and I will be back with a quick video on my signature pages inside my new junky journal soon.
23 june 2012
I spent last night painting my new journal cover. It was the first time I ever painted a dollie in just black and white and I love the results. As the cover of this A3 journal was just thin paper basically, I made sure to cover the finished painting in some matt medium to pr0tect it and it managed to make the paper tougher as well.
Yah it's Saturday! I Hope you are having a superb day.
I have been busy creating as usual LOL and have just finished another journal. If you like the thought of recycling and you have plenty of old greeting cards laying around then you have got to see this one...
Good afternoon Everyone,
Hope where ever you are, you are having a happy crafty day!
As promised, I will be showing you my latest art journal in this video. Its made from old cardboard and very easy to make. Hope you enjoy it!
17 July, 2013
Hi ladies! I finally got around to making another journal today. Well actually I already had started my journal from a recycled book, but had put off doing the cover for some months as I was at odds to what it should look like.
I checked back to some videos of my favourite journal maker Jennibellie on Youtube and decided to cover my second hand hardbound book in brown paper. The book used to be a vintage fashion book and I just ripped some pages out to allow room for the layers of paint on the pages (otherwise the spine will break or you will have a book that never closes) Also be sure to gesso your pages. I think its nice to have some of the underprint showing! I then just started my artwork on the brown paper new cover I made, not really thinking it would turn into much as I haven't done this sort of art before.
Anyway it turned out quite nice and when I was finally happy with the art I then just contact papered the whole cover to protect it. Here it is:


Hi Sonya...
ReplyDeleteAwwwww u make me blush.... your such a sweetie.. xxxxxx
I am so glad you liked my journal, an u did a great tutorial on this... Thanks for the mention too...
Huggies Angel xx
this is beautiful and I like the fabric that was used for this journal cover. I made a journal cover too and I left a link of your blog on my blog which is " http://www.mugwaii.blogspot.com". have a great day, ~Melissa
ReplyDeleteI checked out your blog, making a journal cover is so rewarding. Great job.
ReplyDeleteCheers Sonya